Important Notes (Update Record)
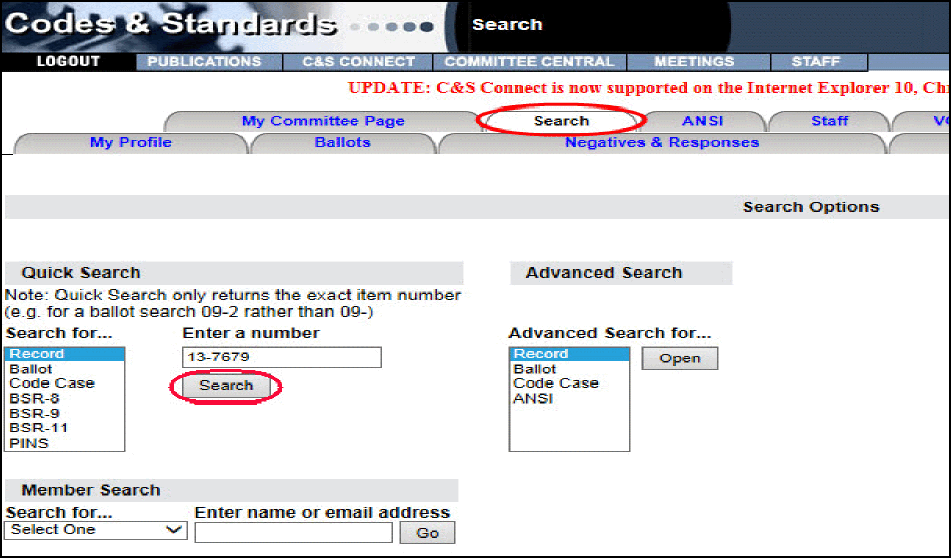
To update a record, click on the Search tab.
Under Quick Search select Record, enter the Record Number, and click the Search button.
Note: You can also perform an Advanced Search to locate the record.
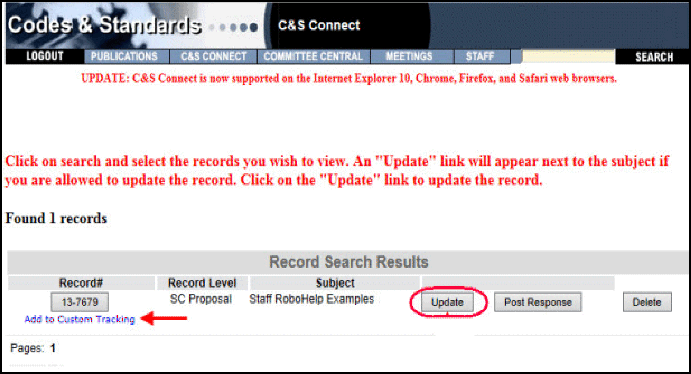
You will see the Record#, along with the Record Level and Subject. Click the Update button. If you would like this item to appear on your custom tracking list, click on the Add to Custom Tracking link.
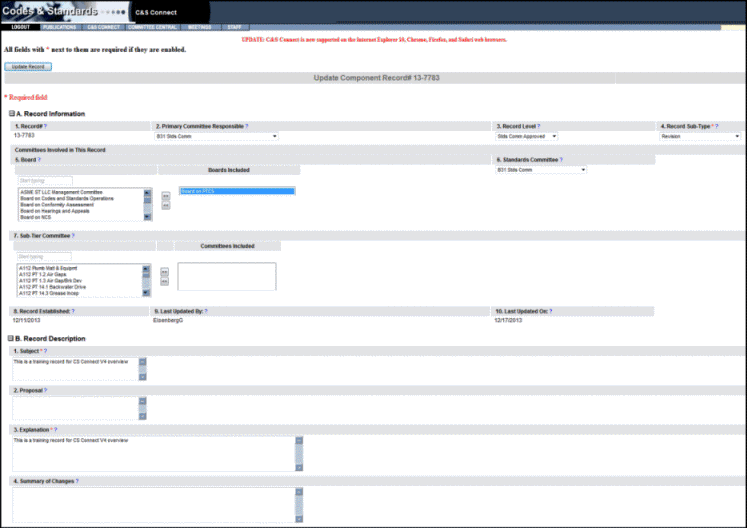
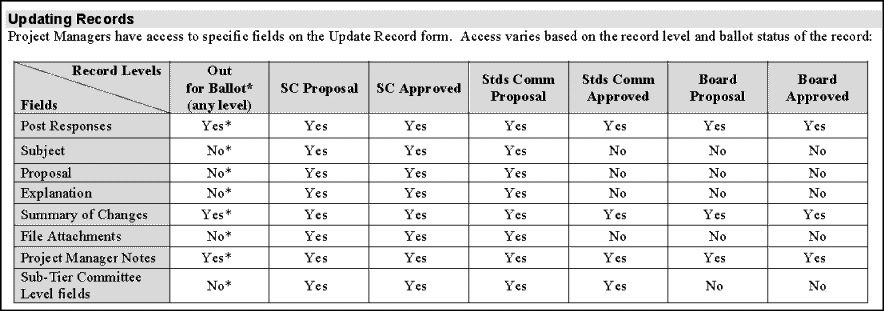
Some of the fields on the record can be updated based on where the record is in its lifecycle (see Updating Records chart below).
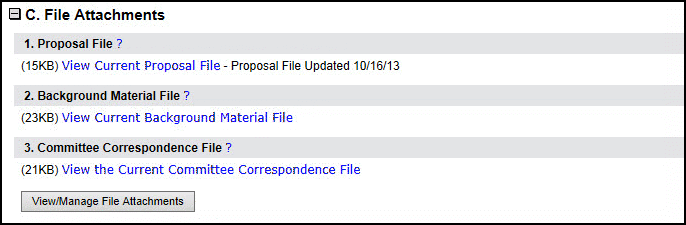
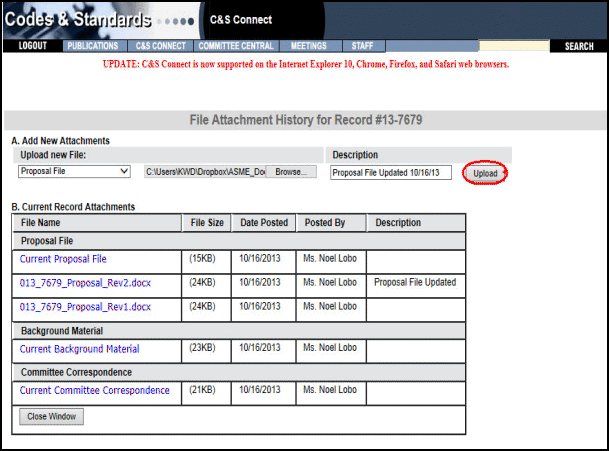
If you want to update one or more of the attachment files, click the View/Manage File Attachments button.
A new window will open allowing you to access historical files and upload new record files.
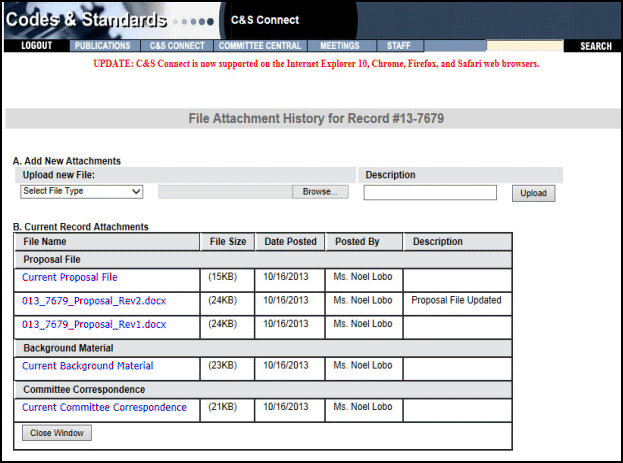
Note: Files are named automatically as you upload them. Once you upload a new file, it becomes the Current file and the old file is renamed using the record number, file type and revision number.
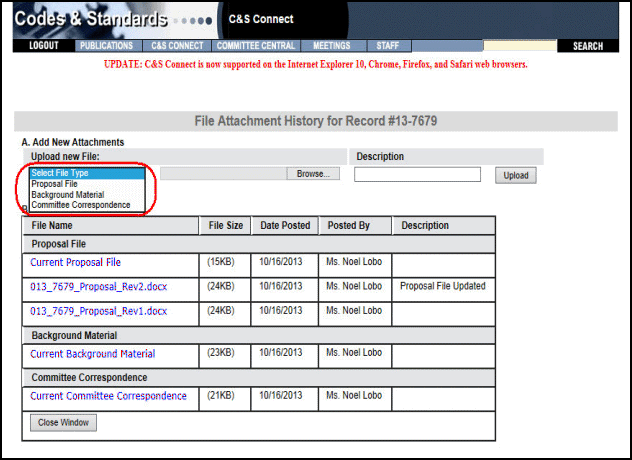
Select the file type from the drop-down list.
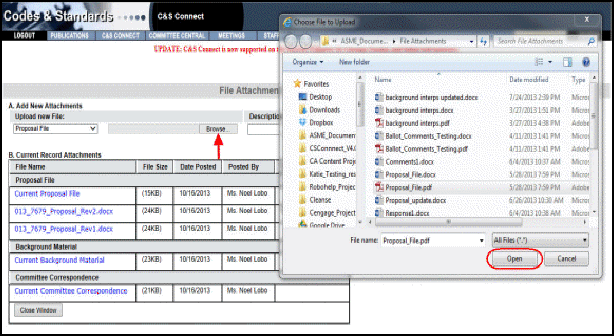
Click the Browse button. A new window will open up to access your hard drive. Search your hard drive for the file you wish to upload to the record. Select the file and then click Open. The file name will appear in the field box.
Click on the Upload button.
You will get a confirmation message indicating the file has been uploaded. The file you just uploaded will show as the Current File and the previous file will be renamed.
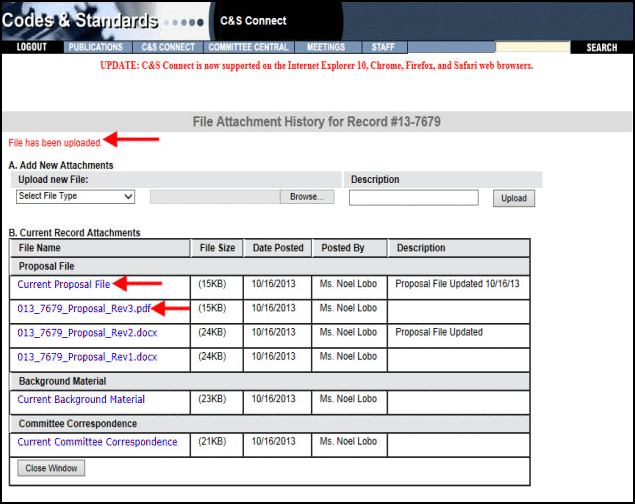
Once you finish, you can upload additional files or click the Close Window button on the bottom of the page to return to the Update Record Form.
Note: The File Attachment area can also be used to view the historical files. Members will have access to a read-only version of it from the view and update forms.
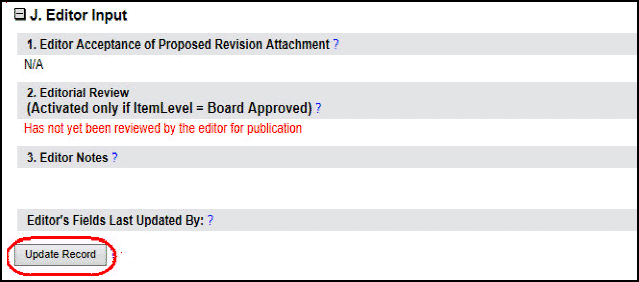
When you have completed updating the record, scroll to the bottom of the screen and click the Update Record button.
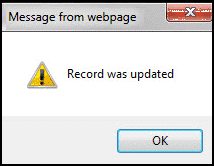
A message box will appear confirming the record has been updated. Click the OK button.
The Project Technical Manager assigned to the record can also update the following fields of the record: Subject, Proposal, Explanation, Attachments, and Project Manager Notes.
The Project Manager also has the ability to Post Responses on a record.
Records cannot be updated when the Record Level is Out for Ballot, Out for Review and Comment, and/or Board Approved
Also See: Project Manager’s Access Rights and Posting Options.
All Interpretation Records are created using the Interpretation Submittal Form by either an outside inquirer or a staff member. Once the form has been submitted, the Staff Secretary responsible for the record needs to review and update the record. This applies to all inquiries including those that were created by a staff member using the submittal form where the inquiry came through other means of communication (i.e. email).
Please see the Interpretations Process Document for more information.
The Staff needs to verify the information in some of the record fields and add information to other record fields as noted below.
Verify Information
Primary Committee Responsible
Record Level
Subject fields under B. Record Description, update as needed
Standard Designation
Edition/Addenda
Paragraph/Fig./Table No.
Subject Description
Update Information
Update Record Subtype, as needed (See the Interpretations Process Document for more information)
Update files for Section C. File Attachments, as needed
Background File (C1) – if one was included with the submittal form, this should be reviewed/updated
Proposal File (C2)
Committee Correspondence File (C3)
Update the Project Technical Manager under Section F. The initial Project Technical Manager is the Staff Secretary for the Primary Committee Responsible. The new Project Technical Manager should be assigned per the primary committee responsible’s process.
Add Information
Add Committees Involved in this Record, as needed
Board(s) (A5)
Standards Committee (A6)
Sub-Tier Committee(s) (A7)
Add the Proposed Question(s) and Reply(ies) to the record (B2). This field feeds to the issued interpretations database, and MUST be updated to match the final version of the Question(s) and Reply(ies) used in the signed issuance needed letter.
Add an Explanation for the record (B3)
Add files for Section C. File Attachments, as needed
Background File (C1) – if one was included with the submittal form, this should be reviewed/updated
Proposal File (C2)
Committee Correspondence File (C3)
Add Section H. Additional Committee Information as needed
Codes Affected by Proposed Revision (H1)
Related Committee Records (H2)
Note: This field is especially important if the record is an Intent Interpretation – see more information in the Interpretations Process Document
Proposal Keywords (H3)
Secondary Committee[s] w/Related Actions (H4)
Type (Nuclear Only) (H5)
Committee Notes (H6)
Text of Committee Objections (if made at a meeting) (H7)
Committee Approval Date (H8)
If your problem not resolved here, send an email to helpdesk.
If you notice a mistake in the help file, send an email to training@asme.org.